
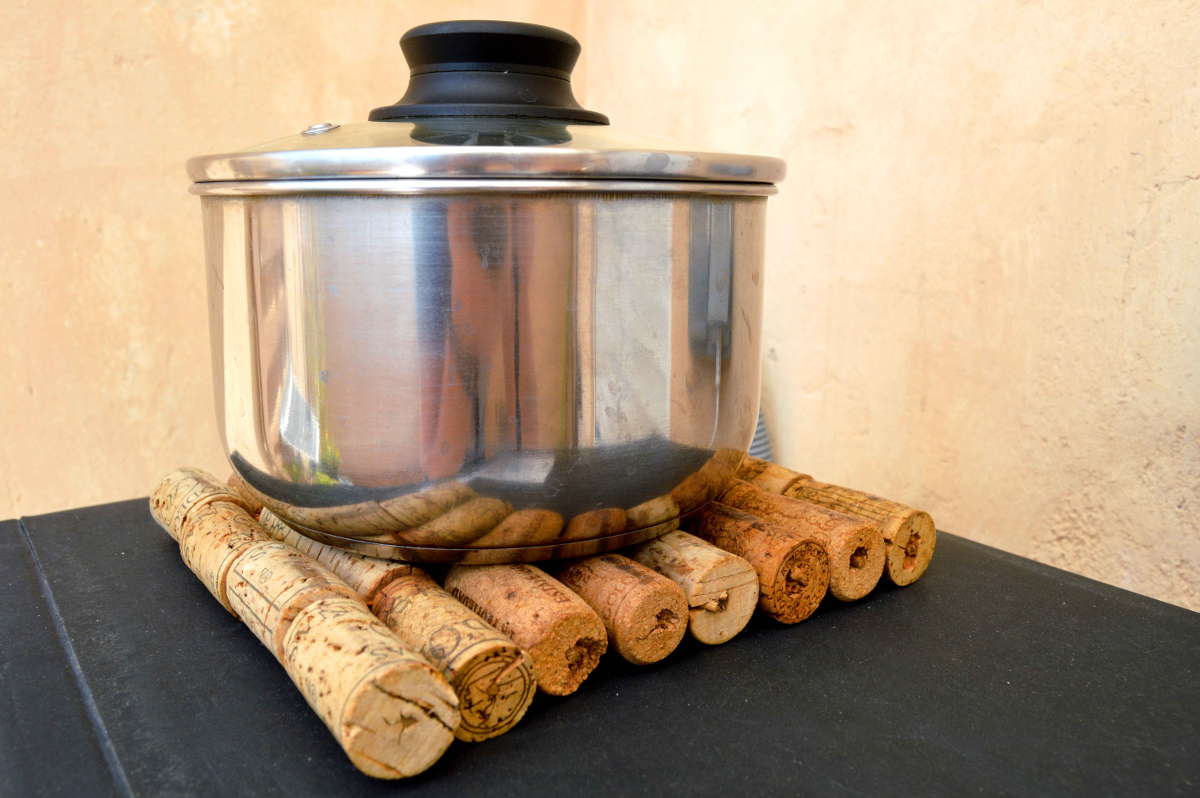
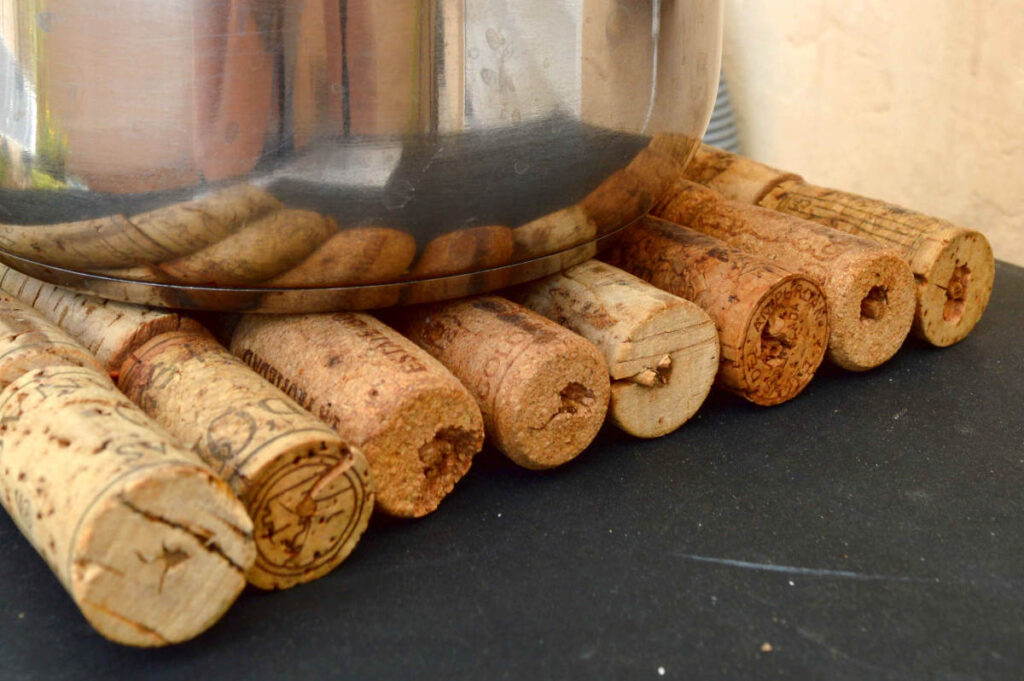
Have you ever looked at the pile of wine corks left over from a few fun gatherings and wondered if they could be reused? Here’s a great idea: turn them into a stylish and practical cork trivet! If you enjoy cooking, you know how essential it is to have a reliable surface to place a hot pan or pot once your meal is ready.
Why cork?
Cork is a fantastic material for trivets. It’s natural, eco-friendly, pleasant to the touch, and has a warm, autumn-inspired color. Most importantly, cork is excellent at insulating heat—perfect for protecting your table and tablecloths from hot cookware.
The best part? It’s free and easy.
This DIY project is quick to complete and doesn’t require any special materials. You’ll likely find everything you need in your kitchen—or you can ask your local bar or restaurant to save wine corks for you. Most places are happy to help, especially when it keeps something out of the trash.
For this trivet, I chose a standard size of 22–25 cm square, which works for about 99% of the cookware in a typical kitchen.
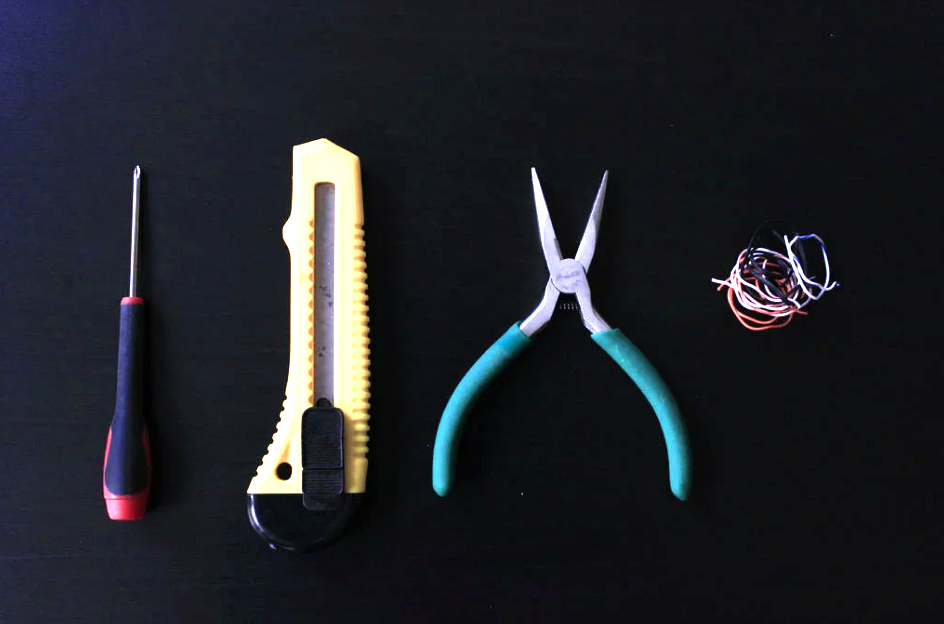
Supplies:
Parts
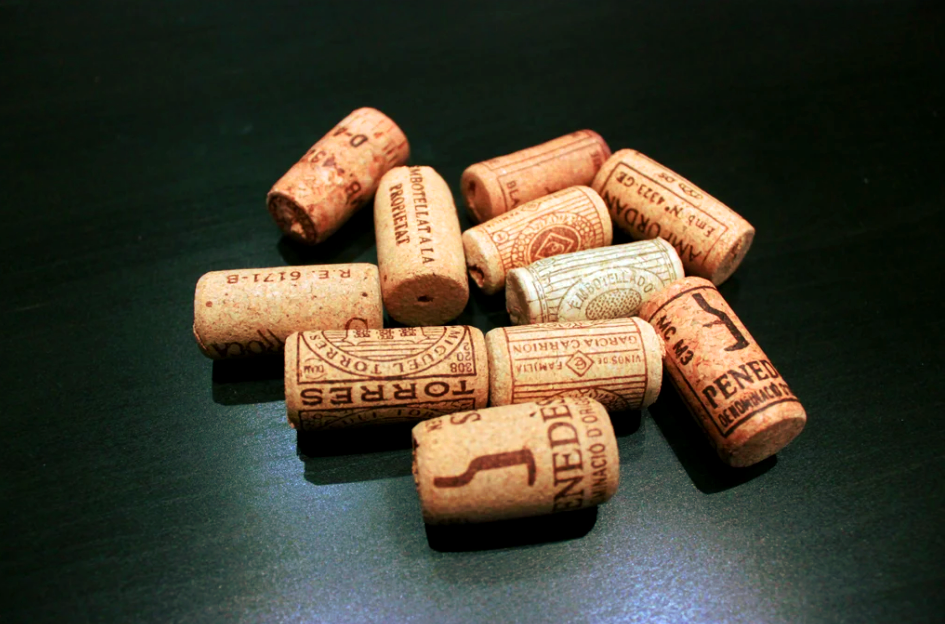
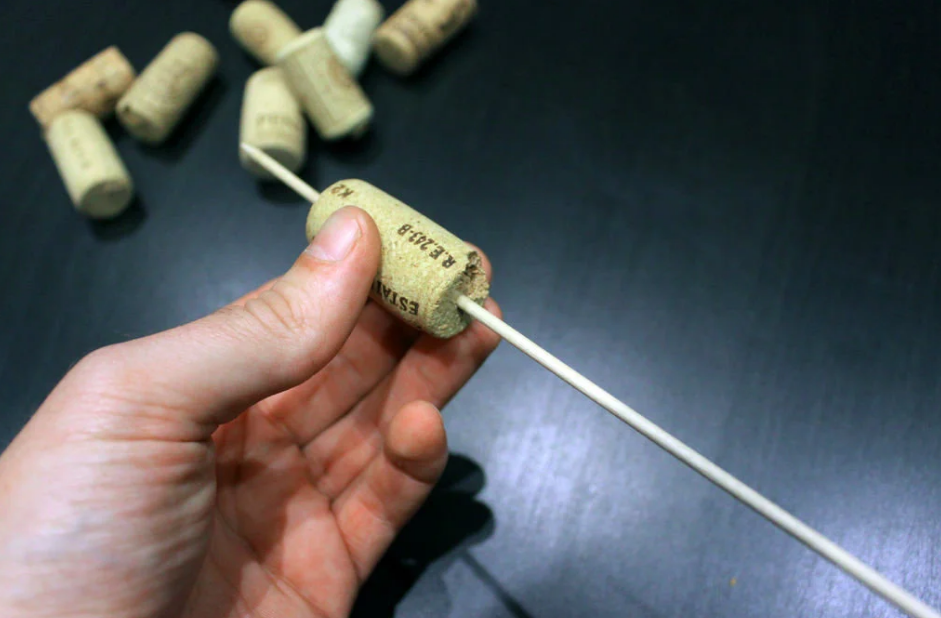
1. Cork wine closures – 32 pieces ( 8 columns x 4 rows)
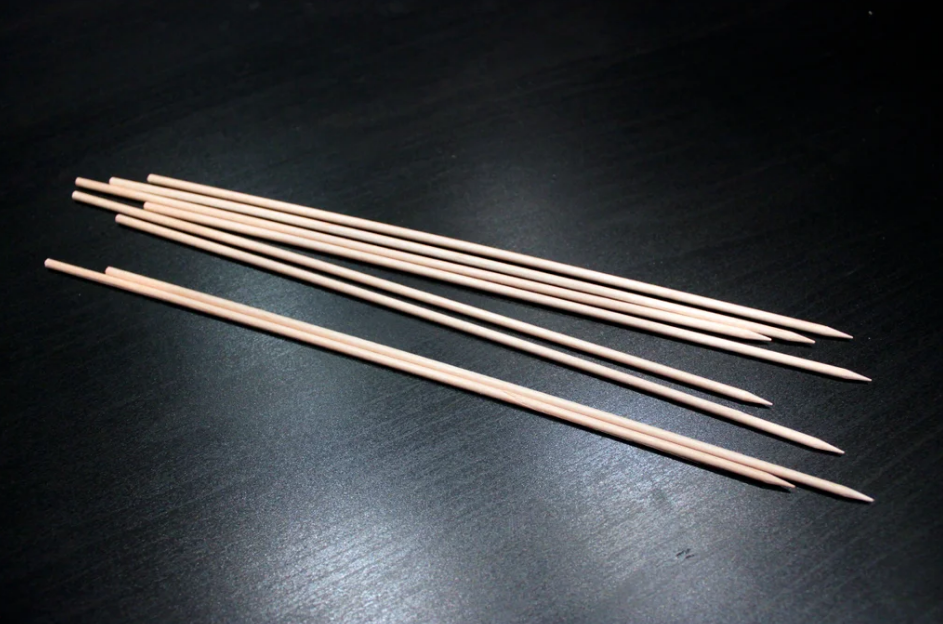
2. Bamboo grill sticks – 8 sticks
3. Thin metal wire or high temp resistant cord – 1.2 – 1.5 meters ( I used random network LAN cable wires )
Tools
1. Аwl or small screwdriver – with more than 5cm needle
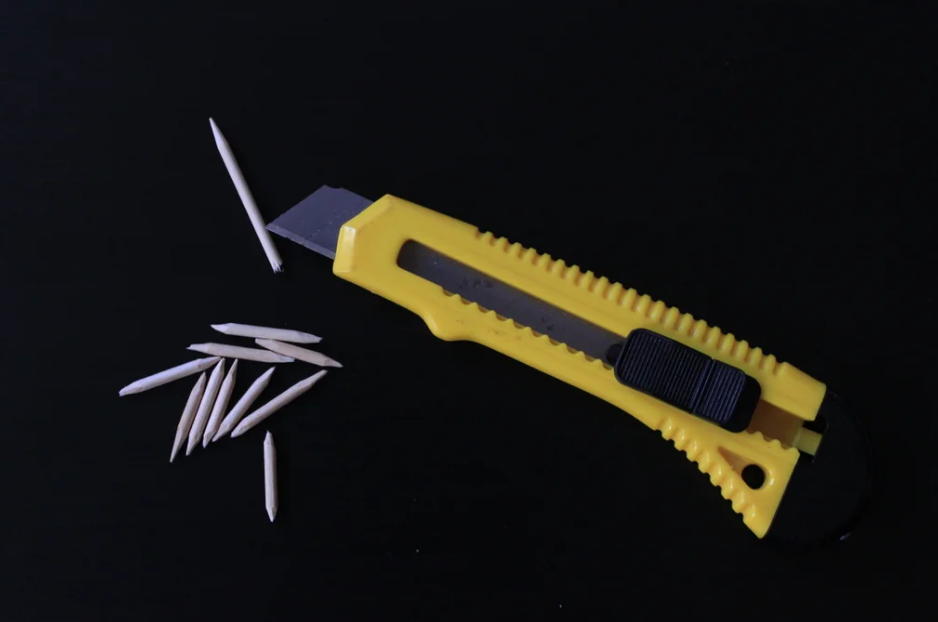
2. Cutter or sharp knife ( to sharpen mini 12 bamboo sticks )
3. Claws or pliers – If you are using a metal wire for the connections (not needed if you are using cotton cord)
Step 1: Attach Cork Wine Closures to Bamboo Sticks
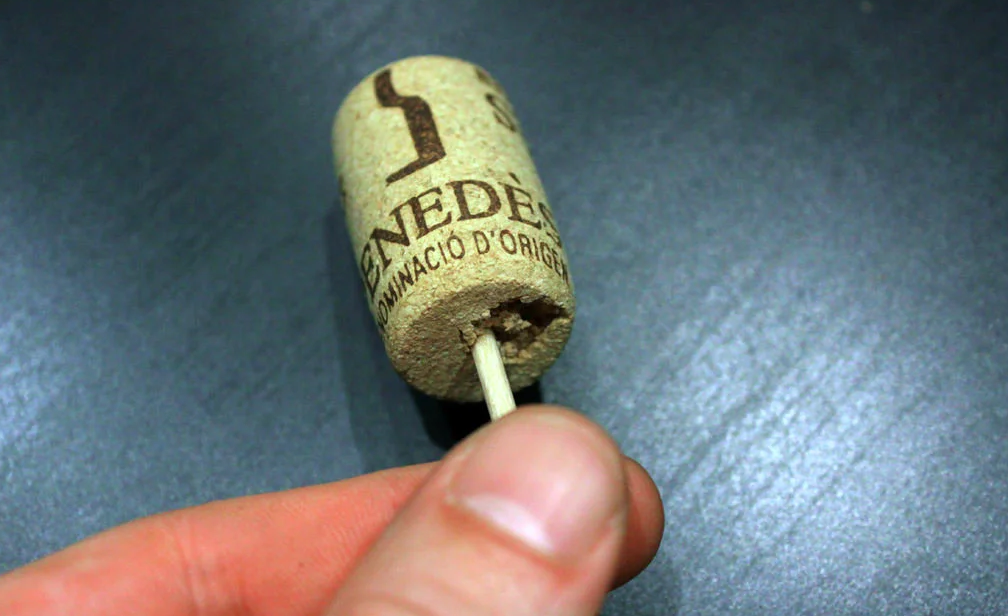
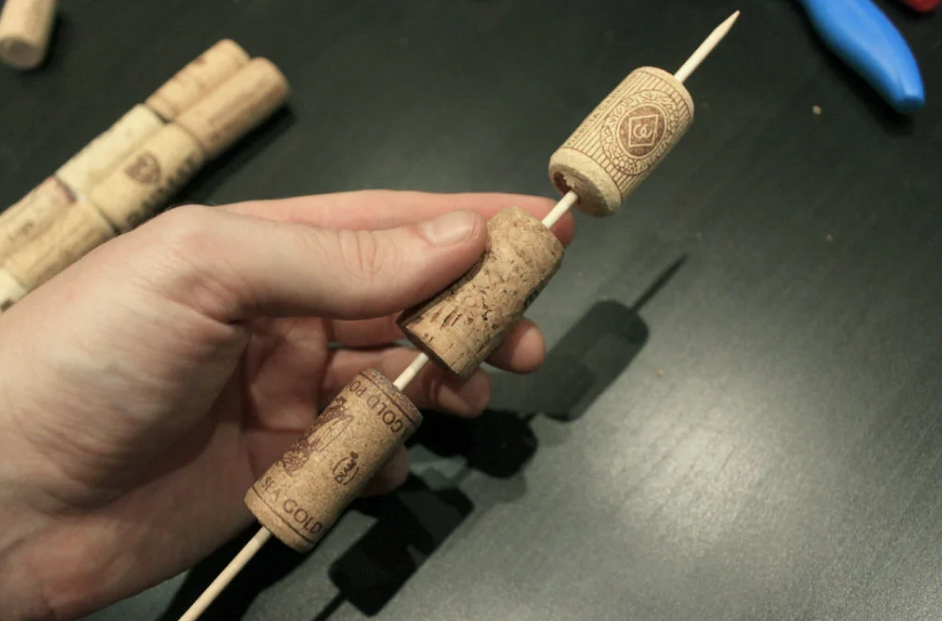
First thing what you need to do after you collect all parts and required tools is to make holes through the long side of the wine closures.
With small screwdriver pierce the center of the circle of one of the sides.
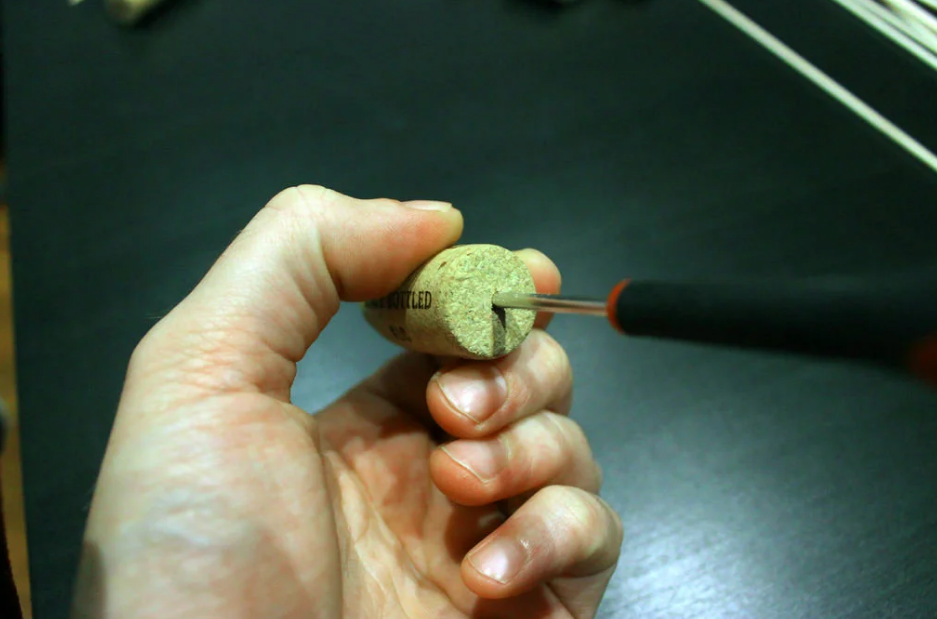
Slowly drill until screwdriver go out from the other center of the cork closure. After you have a perfect hole, put in and out few times the screwdriver in the hole from each side so the hole will become little bit wider, but in the same time not too much so the hole will be loose when you insert the bamboo stick in it.
When you have all 32 closures perforated, start putting them by 4 closures on each of the 8 bamboo sticks. Mind to leave small gap between each closure, so later you can make wire connection for attaching the bamboo sticks together.
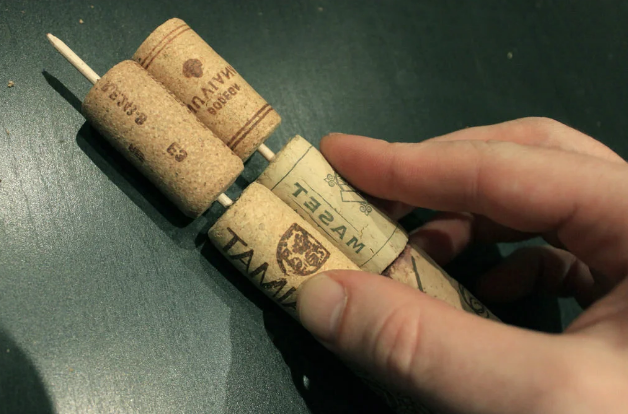
Step 2: Connect Cork Sticks Next Each Other
With claws carefully break the part of the bamboo stick which stayed outside of the cork closure. These small leftovers can be used to make small sharpened mini sticks. They will help you to attach the top parts of every stick.
way sharp sticks
Now it is time to connect the first two sticks with 4 closures each. For this purpose the best is to put 2 small bamboo sticks between the top 2 and 2 bottom closures of 2 sticks. Press hard so the stick will go in both closures and keep them attached.

connect the bamboo sticks
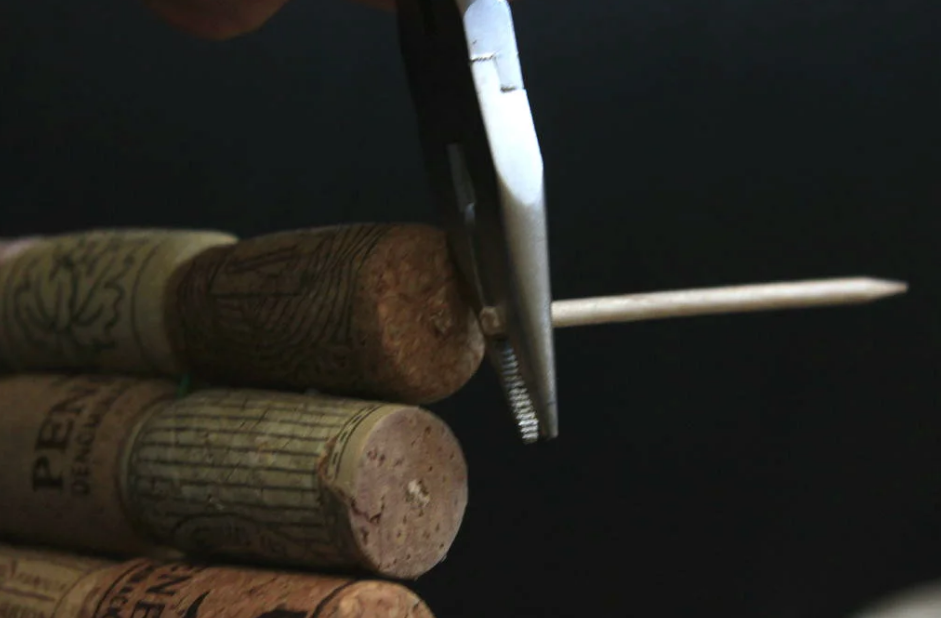
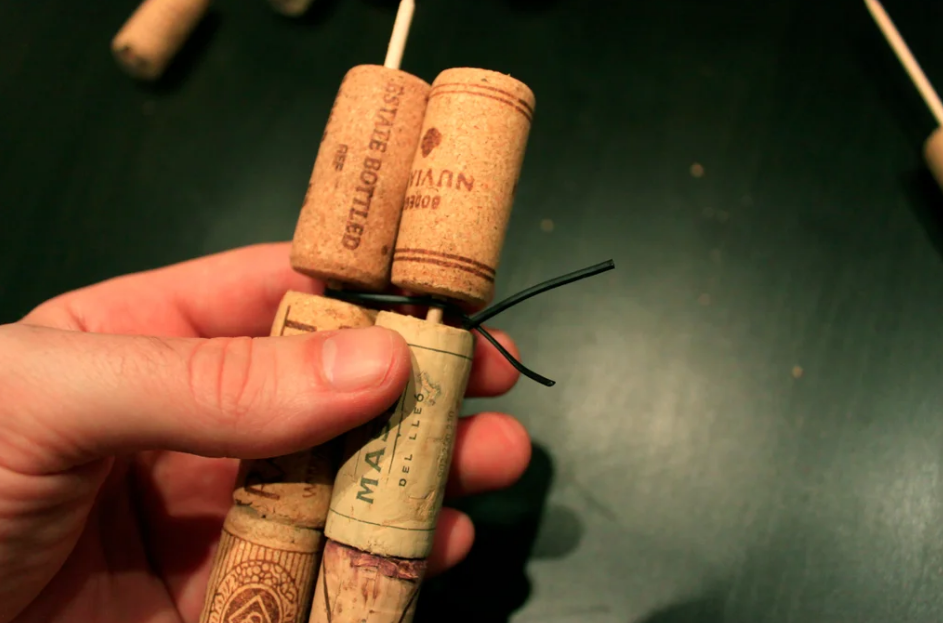
Once you have both sticks next to each other it is time to use the wire and put inside the gaps of the cork closures.
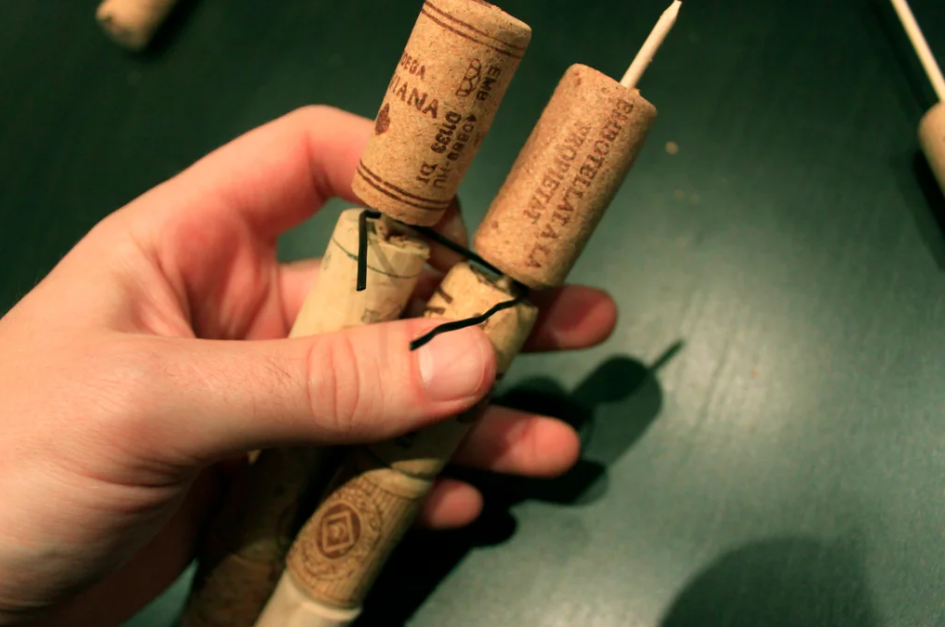
Tighten well the wires so they will pull the bamboo stick closer, but not too much to bend or broke them. Cut the rest of the wire and push the wire bong inside.
To connect 2 sticks with cork closures you will need to wire bonds – between the first and between the last gaps of the sticks. For more details check the photos.
Step 3: Build a square from 8 sticks with 4 closures each
Continue connecting the sticks together. If there are differences between the gaps where you install wires you can create your own by cutting new by knife. Just be careful not to cut the bamboo stick inside.
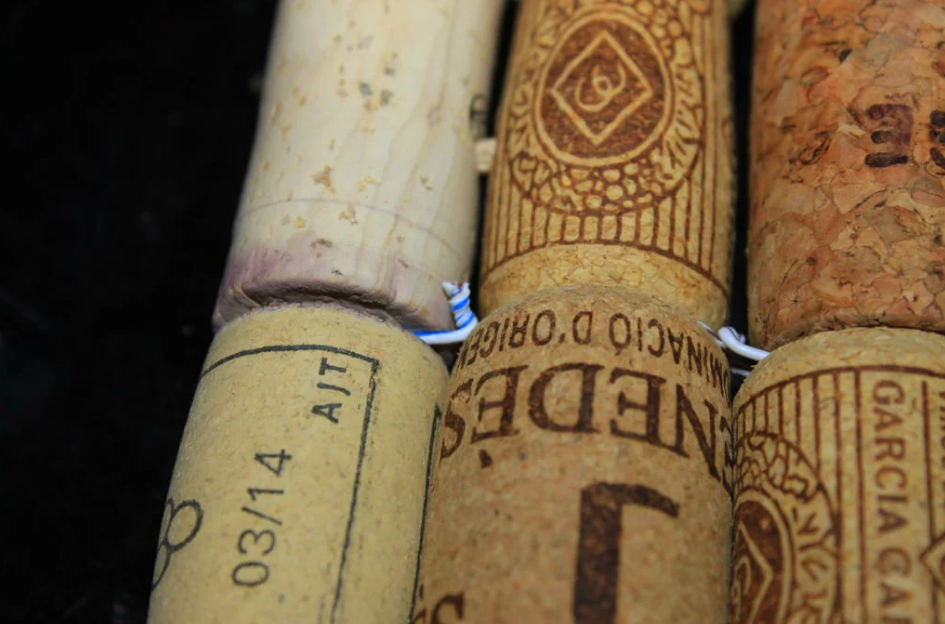
At the end you should have something like square. The shape depends on the types of cork wine closures you find.
There are many ways to improve or make the build of the pad easier. Please, comment and share your opinion if you like the cork wine pad.


support our work with BITCOIN :

1LD5oZMcpyfWJPKzDcv8RVTgVXLZvbr1RY
Your place is valueble for me. Thanks!?
Great idea for wine lovers. Going to check if my cork collection will be enough or I need to drink more regularly 😀